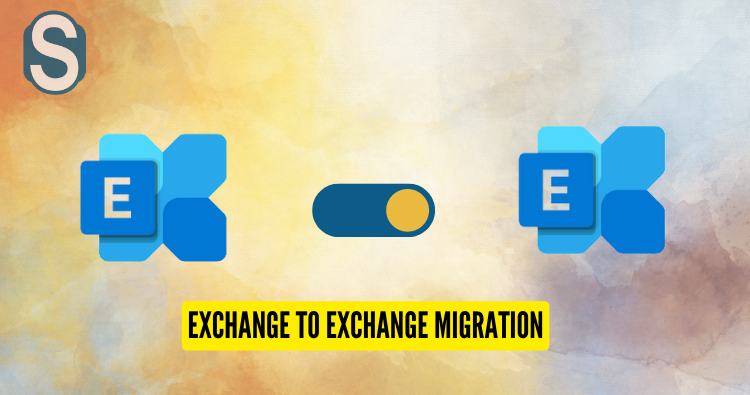
Migrate Exchange 2010 to 2019 using Exchange Migration Tool?
The organization keeps upgrading its emailing platform to comply with new facilities and manage its work better. If we talk about the perspective of the company that is using the Exchange using the Exchange 2010 version, many of them are now looking to upgrade their version. Moreover, the support of the Exchange 2010 version is already stopped, and it’s high to look for Exchange migration if you do not already move into the latest Exchange version.
Many think that migration from one Exchange version into another is a cumbersome task, but actually, they are right. It is the sole responsibility of the Exchange admin to manage the organization’s migration activities. However, a high level of technical expertise is required to migrate Exchange 2010 to 2019 effectively. This blog will have the information that most of the Exchange admin is looking for in migrating multiple users’ mailboxes.
However, before we move to the migration solution, we will explain to you some of the reasons for migration and what new features will come in the later Exchange version.
Why move into Exchange 2019 version from Exchange 2010?
It is obvious to approach for the best, and even as the support for Exchange 2010 has been stopped, it becomes essential to migrate into later Exchange versions. Moreover, technical support means that the users will get the support necessary when they face sluggishness while working, resolution for any bug, etc.
We have also prepared the list of new features that the user will get with the Exchange 2019 has been listed below:
- The end of support means that there will be more bugs while working on the platform. It is one of the primary reasons users leave the older Exchange version.
- Users can also install the Exchange 2019 version in Windows Server Core.
- Includes the Meta Cache Database functionality.
- The active database will get more cache memory in the Exchange 2019 version.
- It also provides support for the non-English character to the email address.
Along with these listed features, there are many more functionalities that the latest Exchange version will get. However, rather than thinking too much about the part of the reason, there is a need to look for the best solution to migrate Exchange 2010 to 2019 version. Multiple approaches exist that help users move from one Exchange environment to another.
However, no methods can take you to move Exchange 2010 mailboxes into 2019 directly. Instead, the user must first move into the 2013 version and then migrate Exchange 2013 to 2019 version. Alternatively, it is best if the users look to migrate into 2016, and then they can easily migrate towards Exchange 2019.
Manual Migration Approach to migrate Exchange 2010 to 2019
STEP: 1 Exchange 2010 to 2016 Migration
As of now, there are no direct ways through which the Exchange admin can migrate directly from the 2010 version into 2019. However, there is an indirect approach by which it is possible to migrate mailboxes. To accomplish it, users need to look to migrate Exchange 2010 to the 2013 or 2016 version. After that, it is easier to migrate to the latest Exchange version.
It is better to migrate to the 2016 Exchange version as it offers advanced features, and the users can also get technical support till 2026.
We will now discuss the approaches for the migration of Exchange 2010 into the Exchange 2016 environment.
Firstly, it is important to fulfill certain sets of requirements before starting the migration. Install the Exchange 2016 server on the system and back up the data, as the migration can also lead to failure for many reasons. After completing the migration prerequisites and configuration settings, start with the migration process using the Exchange Admin Center.
Let’s take a look at the working procedure to migrate Exchange 2010 into 2016 through the EAC:
- The first step is to open the Exchange Admin Center using the login credentials.
- Here, click on the Recipient, and after selecting the migration, choose “Move to a Different Database.”
- You can also add the users by choosing an option: “Select the users you want to move.”
- Click on the Next button after adding the required number of users.
- Assign the name of the migration process.
- Below the migration batch name, select the move the primary and archive mailbox if it exists.
- Choose to Browse in order to set the target location for saving the new Exchange Server 2016 mailboxes. Hit the Next button to move on.
- You can also enter the name of the user with whom you need to share the migration report.
STEP: 2 Exchange 2016 to 2019 Migration
After successfully moving the mailboxes into the Exchange 2016 version, it’s time to move them into Exchange 2019. Moving on to the migration part, you need to make sure to install all the pre-requisite, and then you can only look to migrate into the later Exchange environment. However, it is not easy for the layman user and also takes more time to migrate complete mailboxes. Nothing to worry about as there is a solution that helps to directly migrate Exchange 2010 to 2019 without causing data loss. We will discuss one such tool in detail in this blog’s upcoming part.
Direct Way to migrate from Exchange 2010 version into 2019
If you are limited and in a hurry, you can straightaway look for the third-party migration utility. Shoviv Exchange Migration tool is one of them that users can take into their consideration. This software allows you to migrate Exchange 2010 to 2019 directly, which would help to save your precious time. It gives multiple advanced functionalities which enable users to customize their migration.
Using this utility is not difficult because it has one of the best user interfaces compared to its peers. If we look more at its features, many help to allow users to complete migration timely. Check out some of its key functionalities:
- It won’t restrain users from adding a large number of Exchange mailboxes of any size. Please remember users can add mailboxes of any Exchange version.
- After adding the mailboxes, the user can view the entire added data item from the software preview pane. It will help users to find out unwanted data.
- The software is proficient to migrate Exchange 2013 to 2019 along with the migration of the Public as well as the Private folders.
- An incremental export option also comes with the tool. Users can apply this option in order to ensure about process continuity and no data duplicity.
- Users can use the tool search option, which allows them to locate their desired data item based on search criteria like To, Bcc, etc.
- The tool also allows migrating from the Exchange environment into Office 365.
These are some of its features that come fruitful to migrate Exchange 2010 to 2019 while maintaining the data integrity. The software also offers free technical support and comes in a trial edition. Through its help, users can test the software’s complete functioning.
Conclusion
Exchange migration is not an easy subject where anybody without taking care of migration preparation starts migrating. However, this technical guide will serve as a knowledge base for you to migrate Exchange 2010 to 2019 effectively. Moreover, we will not suggest implementing manual migration. Especially for users who don’t possess the required migration skills. The third-party Exchange migration solution explained also eliminates the double hop migration and allows you to migrate into the latest Exchange version directly.
Note: Using this tool, you can Export Office 365 and EDB files into PST, EML, MSG, Office 365, Live Exchange Server, and Outlook Profile Stores.