Instructions to Draw a Wolf
Instructions to Draw a Wolf. Don’t push down excessively hard with your pencil for the initial not many advances. Utilize light, smooth strokes to draw a wolf.
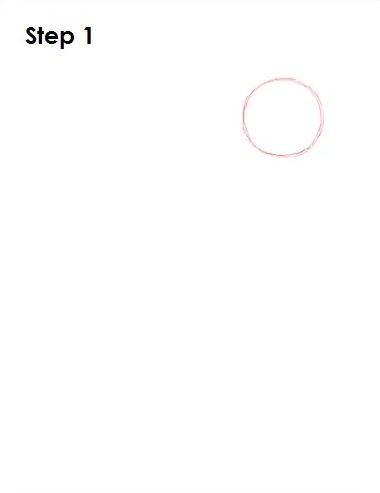
Stage 1
Draw a circle on the upper right side as an aide for the wailing wolf’s head. The process doesn’t need to be great. It’s simply an aide. Leave adequate space at the base for the wolf’s body.
Stage 2
Draw a few bends on top of the head as guides for the wolf’s gag. The curve on the right should be more slender and more limited than the one on the left.
Stage 3
Draw one more little bend on the left half of the head as an aide for the wolf’s ears.
Stage 4
Draw two greater circles under the head as guides for the wolf’s body. These circles should be about double the size of the immediate process. The whole process ought to be straightforwardly under the head. The subsequent process ought to be headed toward the left more.
Stage 5
Underscore the body (one underneath each circle) as guides for the legs. Twist the lines a piece to demonstrate joints. We will collapse the wolf’s rear legs, so the line should be almost level.
Stage 6
Define a couple of boundaries that associate the significant shapes and structure of the wolf’s body.
Stage 7
Define a long bent boundary on the lower-left half of the body as an aide for the wolf’s tail.
That is all there is to it for the underlying representation!
Stage 8
Draw a short, thick line at the highest point of the underlying circle for the wolf’s shut-eye. Define a couple of more modest boundaries around the shut-eye as additional detail.
Stage 9
Draw the wolf’s nose on the tip of the gag. Obscure the line on the edge of the stunt, and afterwards draw the lower part of the nose and the nostril inside. Conceal within a piece of the nose utilizing a lighter worth than the nostril. You can use a much fairer price on a nose segment for the sparkle.
Stage 10
Utilize the underlying curves as advisers to draw the remainder of the wolf’s gag. Follow the way of the aide as you obscure the line and make the top piece of the stunt. Add a minuscule bent line close to the top for the canine tooth looking out. Draw the lower jaw by involving the other bend as an aide. Utilize a thick, dull line for the lower lip, quick, short strokes for the smooth jawline and add the lower canine tooth.
Stage 11
Utilize the circular segment on the left as a manual for drawing the wolf’s ears. Obscure the external state of the ear as you follow the fundamental way of the aide. Add a couple of strokes inside for the fur. Define one more bent boundary for the ear looking from the opposite side.
Stage 12
Utilize the underlying circle as a manual for drawing the remainder of the wolf’s head. Utilize fast, short strokes as you obscure the line to address fur.
Stage 13
Involving the line on the right side as an aide, draw the wailing wolf’s front legs. Delicately sketch the state of the primary portion as you follow the fundamental way of the line. Obscure the lines utilizing quick, short strokes to address fur whenever you get the design right. Twist the leg at the joints and add a few lines at the base for the wolf’s toes and nails. Draw the apparent part of the leg on the opposite side, involving the primary portion as a layout.
Stage 14
Utilize the base circle and the calculated line under it to draw the crying wolf’s rear legs. Gently sketch the state of the highest point of the portion inside the process and the lower part of the leg along the way of the calculated line. When you get the leg’s construction right, obscure the lines utilizing fast, short strokes to address fur. Define a couple of boundaries at the tip of the toes and nails. Add the apparent piece of the wolf’s leg on the opposite side.
Stage 15
Draw the remainder of the wailing wolf’s body by involving the underlying lines and shapes as guides. Utilize fast, short strokes to address the wolf’s thick coat as you follow the essential way of the aides.
Stage 16
Utilize the line on the lower passed side of the wolf’s body to draw the tail. Bend the bottom before the rear feet. Utilize longer strokes as you draw and make it arrive at a point toward the end.
Stage 17
For a cleaner look, delete however much your jar of the first rules. Try not to stress over deleting the aides in general. It’s alright to abandon some. Re-draw any last sketch lines that you might have unintentionally eradicated.
Last Step
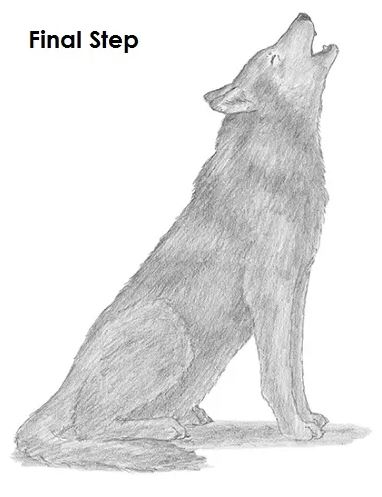
Add a concealing to your crying wolf attraction to give it more aspect and volume. Pick the course of the light source while concealing, so the shadows are predictable with it. Try not to stress a lot over the overshadowing on the off chance that you will increase the value of your wolf drawing.
Add a cast shadow. It helps ground the wolf, so it doesn’t give off an impression of being drifting.
Drawing Finished
You can add more worth all through your wolf drawing for additional detail. You can likewise preclude the additional concealing for a white wolf or an icy wolf. Make specific segments more obscure and others lighter to get the ordinary dark wolf coat design. Shift the strain on your pencil to earn different college educations of apparent worth. Add the value by utilizing strokes that head down the overall path of the fur—other, every individual stroke a piece to get a more downy surface. Adding the coat example can be very tedious, so be patient and enjoy reprieves. It’s generally brilliant to involve references for a more precise drawing. Remember to stop the “How to Draw a Wolf (Wailing)” After each progression to draw at your speed.
Also read: 7 Facts why the Bridgestone Tyres are the Best Auto Tyres in UAE