How do I Remove a Whole Background from a Photo

Do you know? About 60% of images are background removed somehow that is being used for marketing purposes. Background removal can ensure more flexibility to represent any subject differently and helps to create more appealing images to use.
It is not a complex task. You can easily do it and get benefited if you know how to do it. If you are interested, read this article throughout. By knowing how to do it, you just have to practice to get the expertise. The eCommerce site owner, photographer, ads agency, and other professionals require this service to enhance their work. So, if you will become an expert, you can do the task for your work or do the service to earn more.
Why and When do You need the Background Removing?
When you use a photo for any purpose, the photo needs to be appealing to the viewers. Otherwise, the purpose may become a failure. Background removing is an effective image editing service that can help you to create more appropriate images that you may require.
When you need more than one subject for a photo, you can do the background removing and add several subjects or objects in a single photo. By background removal, you can add a different background to the foreground and check what will suit the most. It also helps when you will go for other types of image editing time, photo retouching, adding a shadow, creating visual effects and so many.
How to Remove Whole Background from a Photo?
There are several ways to do it. But when you will use Photoshop or a similar kind of software for this task, your editing will be up to the mark. It is better to avoid shortcuts that can reduce the qualities. Here I will discuss some Photoshop whole background removing techniques that will help you to understand the process.
1. Using the object selection tool
It is a new feature of Photoshop. This feature uses AI technology to provide good results. When you will use this tool to remove the whole background of a photo, you will face fewer complexities to handle.

Select the object selection tool from the toolbar. Then move the cursor over the subject that you want to select and remove its whole background. After doing this, you will the subject you choose is turn blue. That means your subject has become the foreground. You just have to press the Shift button to remove the background instantly.
2. Using the eraser tool
Using the eraser tool is a classic way to do this task. It requires a fair amount of time but this can ensure a more appropriate result that you want. To remove the background from a photo, you can follow this process and get benefits.
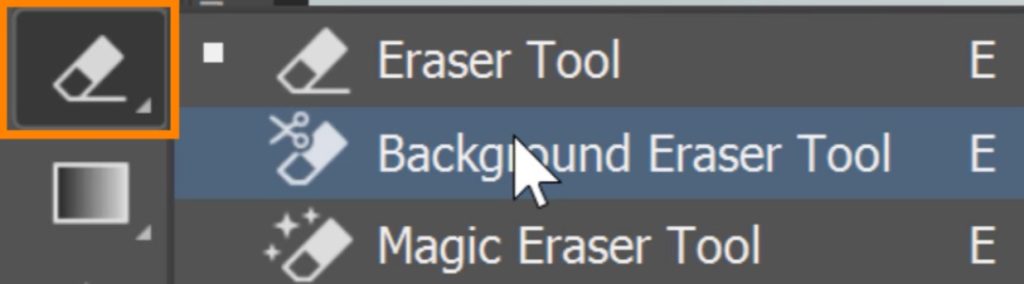
First, select the eraser tool from the toolbar. Now, the options. Choose a brush to erase the background. You have to set the sampling, limits, and tolerance rate of the brush from the options. Then you can start your erasing work. You have to adjust the brush size and other related factors based on the foreground and background edges. If you accidentally erase part of your subject, you can easily undo that and continue your work.
3. Using the pen tool
Where the other quick and easy actions are failed to provide a solid output, the pen tool is a master tool to do this job. It can ensure sharpness and more accuracy if you can remove the background using the pen tool.
Most professional photo background removal service providers use the pen tool to ensure the best outcome. If you have basic knowledge about photo editing and Photoshop and also some experience, you can use this tool to complete the task.
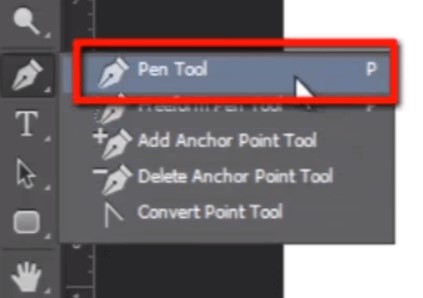
To use this useful tool, select the tool from the toolbar. Then zoom in on the photo and start from the edge of your selected subject. If you click on the edge, you will see the first anchor and now work around the subject. Move the cursor to adjust the path according to the shape of the subject. When you will cover the outlines of the subject with the lines, the path is completed. Now, remove the background easily and separate the foreground from it.
4. Using the magnetic lasso tool
The magnetic lasso tool follows the same selection technique as the pen tool. But it is less laborious and easier to follow.
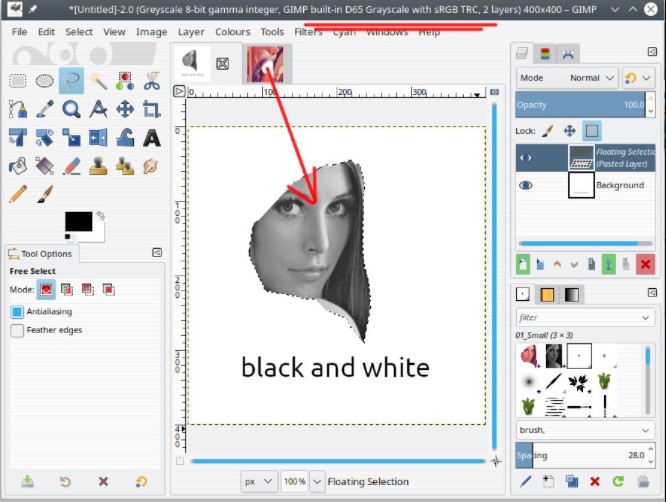
You have to choose the tool first. Then start drawing around the edges of the subject. You will see a path as the pen tool did. Try the slow and deliberate move to cover the whole shape of the subject. When the path is complete, you can remove the background.
5. Using the quick selection tool
This tool is becoming more popular. Using this tool requires less time but it can provide quick refinements. You just have to paint your subject with the tool after you choose the tool. If you accidentally paint outside of the subject, you can easily adjust it by pressing the Alt button. When you feel the whole selection is appropriate, you can remove the background and then complete the task.

Things to Do after Removing Whole Background
- After removing the whole background, it is ideal to save the file in PNG format.
- Sometimes, you may require some color adjustment after removing or adding a new background to a photo. Do it instantly.
- Try to keep the editing simple.
- Use appropriate backgrounds for better results.
Final Words
Removing background is one of the most used photo editing services. This editing helps to create more appealing and more subject-focused images. You can learn it. Just practice it for days. You can also take the service from the experts for your work if you don’t have enough time to work on it. Have a nice day!
If You have any question you can drop your opinion in our comment box. we are really appreciate it and give value able feedback
Have A look: